Showing posts with label sewing. Show all posts

Tuesday, February 7, 2012

So Behind!

For the corset sew-along, that is.  I got to distracted trying to finish my other corset...and then dogs and going back to school got in the way, and I haven't felt like sewing!  I'm pinning the final pieces together currently, we'll see how long that all takes. 

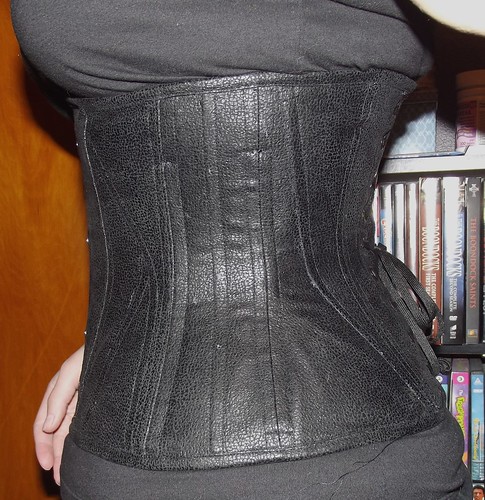
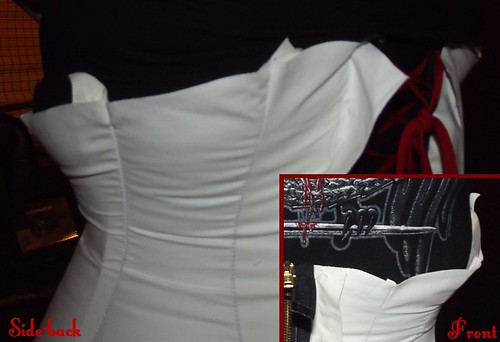
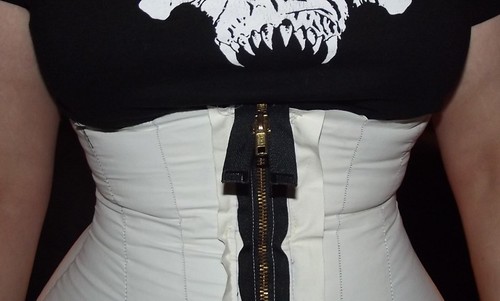
But I am finished with my underbust corset!  I took some better pictures this time:

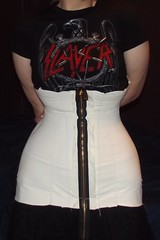
Underbust #2 Front

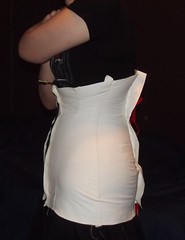
Underbust #2 Side

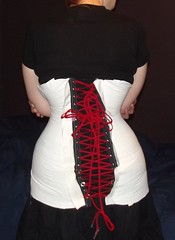
Underbust #2 Back

I'm quite pleased with the binding at the top front, although the bottom is just a tad uneven.  I used a blanket binding  method, by the way.  I cut out two-inch wide strips of my fashion fabric, folded it in half, sewed it to the top edge of my corset with the raw edges  next to each other (like I was sewing a side seam), and then turned the folded edge over and stitched it down from the front.  Since it was a knit suedecloth, it molded itself around the edges perfectly.  It doesn't look the best in the inside, but that's because my strips were a little too thin, I think--if they were wider, it would have allowed my stitches to catch the binding on front and back.  It's secure, though, so I'm not worrying.   

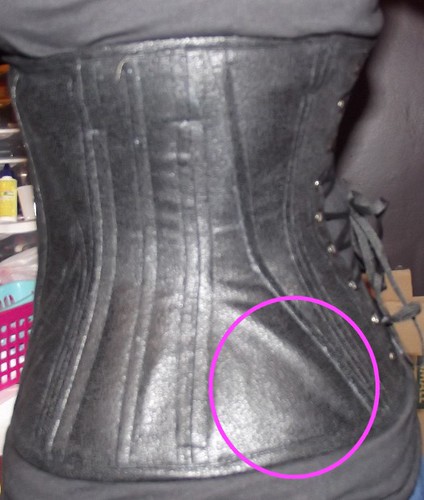
The side view is the same one I showed last time; I fixed the wrinkle almost completely!  The loose thread is still there in the photo, though--I still need to tie it down and hide the ends.

The back is still not a great photo, but it will do.  I vertically boned my modesty panel with three leftover bones, but I should have done some horizontal boning, because as you can see, it wrinkles together.    I made a "floating" panel, so it's being held to the corset by two sets of grommets which the lacing goes through, but I'm thinking if I tack down the one side of it to make it an adhered panel, it may be easier to coax into laying flat when I put it on.

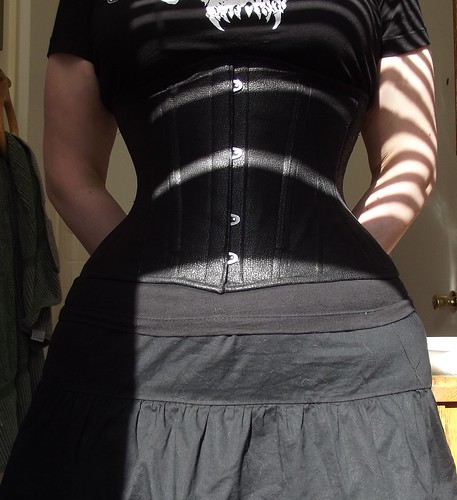
And for a bit of a better view of the shape it gives, here's a slightly farther away shot... the lighting turned out bad, but you can still see the silhouette.

Underbust #2

Yes, those are my xbox huge hips that flare out even to the hem of my shirt and after.  I'm wearing the corset loosely, so it only compresses my waist by about 1.5 or 2 inches, but the effect looks good so far.

Sunday, January 29, 2012

For Your Aching Bones..

A heating pad!

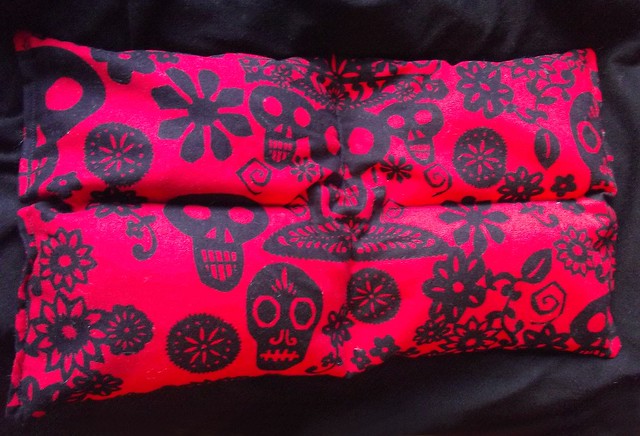
Homemade Heating Pad

I made this a while ago, but since I had a chance to use it recently, I figured why not take some pictures before it gets even MORE covered in fuzz.

It's really just a basic rice-filled cotton bag.  That's all.  There are so many tutorials for them out there on forums and blogs, but to me they're either too floppy (just a sack the rice can fall all around in--thanks, gravity) or too structured (sewing the rice into tiny little tubes works fine, I suppose, but when you stuff it too much it won't really conform to all your achy curves).

So, I combined the two ideas and sewed mine together with four separate stitch lines, neither of which intersect or connect.  You can kind of see the stitchings in the picture--they stop in the center before the middle skull in the trio's teeth, and they stop before the edges of the bag, as well.  The little unsewn sections provide some place for the rice to move around to, but it will mostly evenly stay in the four sections.  This means you can wrap the bag around your neck, drape it over your shoulder blades, lay on it...whatever you like. The rice won't all fall to one corner, and the heating pad won't fold like a piece of cardboard! 

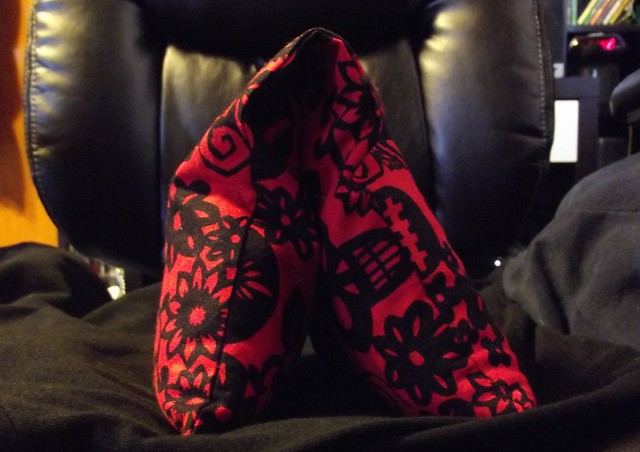
I plan to make more, so I can probably shoot a photo of my "pattern" later on.   In the mean time, here's a photo of it holding its shape even after I fold it up--the color is also a little more accurate in this one:

Heating Pad Floppiness


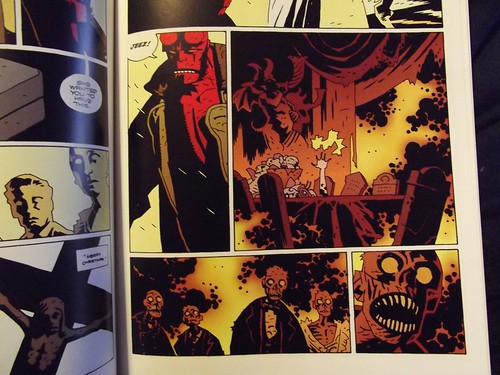
PS: That fabric?  It's some print I found in the remnants at a fabric store around here... I think it's by Robert Kaufman.  But I love it because it's not the normal bright tacky sugar skull print, AND IT REMINDS ME OF HELLBOY.  The moment I saw the print I was reminded of Mike Mignola's simplified skulls and limited color palettes.

Look a bit Familiar?

But shhh, don't tell anyone I'm a geek.

PSS: Those same "tutorials" on the internet all suggest filling your bags with calming lavender essential oils or some such thing.  Being that I like heating pads to make me feel better so I can, you know, do stuff, and not sleep, I decided to scent mine with a vanilla pomegranate... Bad idea.  Apparently when you heat some essential oils they just smell like cheap plastic laced with fragrance.  So, in the future, I will not be scenting these things, thank you very much.

Saturday, January 28, 2012

I Finished It!

Well, almost.  You can see in this rather blurry side picture below that I have ONE major wrinkle still left in my underbust:

Underbust #2--99.9% Finished!

So after putting in 10 bones--one  1/2inch one at each seam, and one 1/4th inch one on each side of the grommets--I realized that my corset still retained a lot of the minor wrinkles you can see in my last post.  So I went back and added more bones, this time all 1/4th inch ones. On each side I added two at the front, one at the middle, and one at the back.  This eliminated the problem almost entirely, and it was good enough for me.  So that's 18 bones altogether, not including the busk. I could have put another pair on the opposite side of the grommets, but, well... my hasty sewing errors didn't allow for enough room there.

Then, when sewing the binding on,  I unknowingly moved the top knit layer a teensy bit.  Now my wrinkle is back!  But I'm hoping a few well placed hand stitches along the binding layer will fix it.  I guess this is what I get for securing my knit fashion layer to the duck cloth at the side seams only, and not at the top and bottom, too.

Otherwise, I'm pretty pleased:

Underbust #2--99.9% Finished!

I mean, the binding edges aren't perfect, but it was my first time.  I think I may need to make a quickly boned modesty panel because, well, can you SEE that back fat by my laces in that blurry picture?  Overall the corset is a little too small in the top back area, so I get a little "back fat" spillage over the top.  Drafting error #1.  I'm hoping that evens out with a different bra and a little more wearing in, though.  As you can see in the above picture, the bra/shirt combination is also covering the top of my corset, and maybe pushing it down a tiny bit.  I didn't notice this problem with another bra I was wearing during the mockup, and I didn't notice as much of a "back fat" problem, either, so I'm hoping switching back to a different undergarment will fix a bit of the problem.

I ended up taking 1 inch off the length over my hips; the pattern I made cupped them fine, but looked a little dramatic/costume-y. This was drafting error #2: I built the corset to be 9 inches high, but I drafted it as if the 9 inch line went straight from my underbust down to my full hip.  When I edited in the curve I wanted, the line came out to be quite a bit longer than 9 inches, more like 10.5 or so.  (If I were more awake I might have some more technical math and geometry oriented explanations for this, but I just can't find the right words.) I also loosely lengthened the front to accommodate the 9 inch busk I had.  It makes a pretty nice point, I think.

Oh, yeah, and I got size 00 grommets--which work pretty well with my cheap-o grommet setter, and I'll have to post photos later--but I accidentally put in two of them backwards.  I put in a third backwards on purpose after I realized the first one was backwards, to try and "even it out" on each side, but uhh..... yeah, I'm just thoughtless sometimes!  I used the hole punch on this, too, since I could not get 4 layers of duck cloth and two layers of suede cloth to stretch evenly enough to properly put into a grommet.  That's my fault, since I wasn't sure how many layers to keep in the back, and just went for "more is better". 

But I don't even have pictures of the back of my corset at the moment, so that's the third minor finishing touch I still need to do. :)

Monday, January 23, 2012

More of that corset...

I've been really into finishing this the last few days.  Even though I worked, I did some stitching around the edges  of the fashion layer/second strength layer pieces to secure the fabrics together and make them act "as one".  Then I sewed them together the other night....

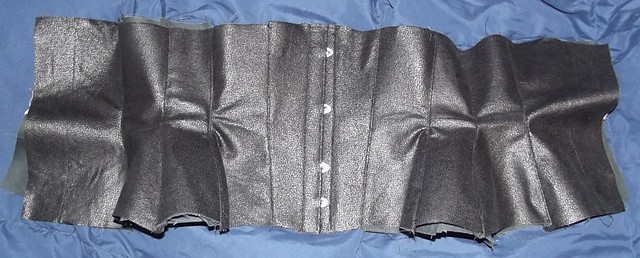
Underbust #2 - Almost Done!

It's looking pretty good, in my opinion!  There are a few of the hip pieces that "wrinkle" weirdly due to the very curvy seams, but those wrinkles aren't sewn in, so I'm hoping the boning sorts that out.  In fact, I just noticed now that in this picture, the wrinkles are pretty much identical on each side, which leads me to believe my problem may really be as superficial as I think.  The next step is to add boning and really test it out.

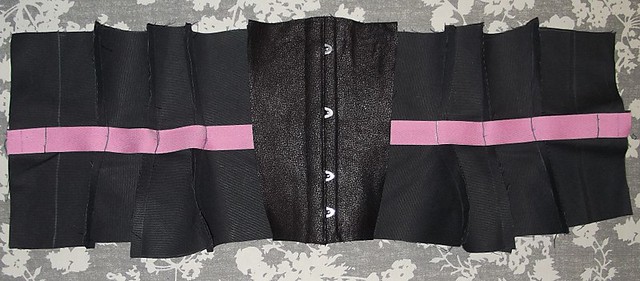
Now, here's some shots of the inside to show my method!  You see, I have a habit of trying something different every time I try to construct a corset....even though, like I mentioned before, I've never yet entirely finished one.  For this one, since I was using duck cloth for strength, and was unsure at the time about its properties,  I decided to do an inside layer of duck, and an outside layer of duck topped with my fashion fabric.  They are sewn separately, only connected at the busk so far. 

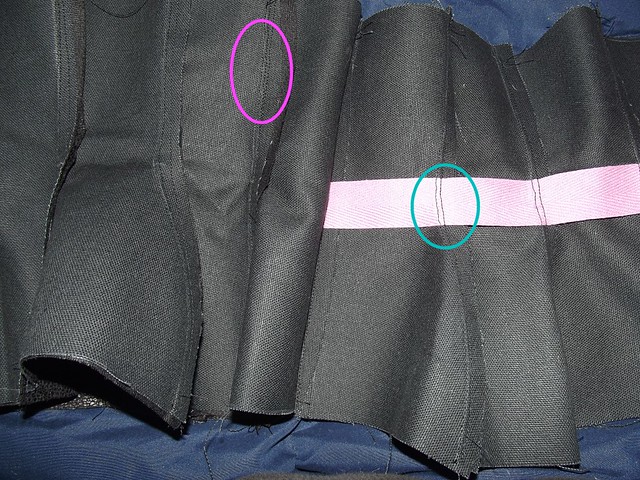
Underbust #2 Seam Stitchings

In this photo, if you enlarge it, you can see that in the fuschia circle there are three sewing lines.  This is my top layer, and the right-most line is the one that is holding my suedecloth to my duck.  The middle line is the base seam holding different panels together, and the left-most line is the topstitching holding the seam--and the seam allowance--down.   In the blue circle, you can see only two lines--the left being the seam, and the right being the top stitching over it.

Now, it might not look like much in the picture, but you'll notice that the seams of both sides are facing the same direction.  That's because the front side is turned over; when properly laid flat, one side of the seams will face left, and one will face right. The plan is to stitch about 1/4th of an inch from a panel's seam on either side, which will leave me with a built in boning casing--the boning will fit between the seam allowances, giving it two to three layers of protection on either side.  I'm not even sure if that will make sense to ME later on, but there you go.

Lastly, because I sometimes fail at sewing overall... there's the one thing bothering me about my construction so far:

Underbust #2 Topstitching

Once again, you might have to enlarge it to see it, but this is where my top-stitching kind of wavered--mostly, when I was trying to pull the seam into the right shape at the sharp waist curves, the pulling caused me to stitch a lot closer to the seam line than I wanted.  In the left circle there's about a 3mm distance from the seam to the top stitching--this seam is by my ribcage.  In the right circle there's only about 1mm from the seam to top stitching...right at the waist. :(  Since it will get more top stitching, and there's also a waist tape for strength, I'm not too worried about it now. 

Friday, January 20, 2012

Failings

I failed at sewing the last few days.  Really, really failed.

First of all, someone left a burner on for 4 hours the other day--low enough that you couldn't see any flame, so when I finally noticed it, the house smelt like gas.  How is that relevant?  Well, I was afraid to do anything lest I end up in flames.  Seriously, I had visions of a  Watchmen-like fiery death running through my head.

Then I just couldn't quilt.  I tried sewing the sashing on the fourth row of my Halloween quilt, and it was worse than the first row I ever sewed.  I picked out 3 of my 4 rows of in-the-ditch stitches because they didn't catch the sashing in the back.  Then 2 out of 3 of those rows still had to have some "touch ups" to catch all the sashing the second time around.  The one that I didn't have to touch up, well, it's just pretty wobbly looking.

But I'm leaving it; I don't want to get frustrated!

At least I could still sew garments, and spurred along by the sew-along, I started sewing another corset:

underbust01

I got the lining entirely finished; in fact after this picture, I sewed my seam allowances down flat about 1/8 away from the original seam.  The busk is all in, the waist tape is all in, and the front two panels have their top layer and fashion fabric on -- it's some moleskin/suedecloth with a plasticy stuff fused to it, and it looks pretty much like real leather.

I made the pattern myself, but I didn't make a mockup, so we'll see how that comes along!  I was already just a tad bit off with my middle panel; I marked the waist line, but there's more space at the top of it than at the bottom.  There's only two front panels, and three middle/back panels, so I'm afraid the hip curves may start too much towards the front until it get's laced tightly.  But like I said, we'll see.

Wednesday, January 18, 2012

Progress 2.0

In between sewing the corset, I'm also sewing together the center of my quilt.  It's starting to look like an actual blanket now!

Starting to Look Cuddly!

You can tell from the sashing strip at the bottom right that I'm not the greatest at this--but this is my first time doing it!  As I mentioned before, I'm using the quilt as you go method, though instead of using a blanket stitch to hold it all together, I'm "stitching in the ditch" of the front sashing, and carefully pinning to make sure I get the back sashing sewn down with it.  The front sides look pretty good, right?  My stitches are almost invisible up top, except for a few spots where I sometimes "wandered" a teensy bit.  The back, though... I'm not sure if it's stretching out to make uneven strips because I didn't cut on grain, or what. 

But since it's the first time I've done it, as long as it's all sewn down and it hides all the raw edges, I'm happy!

So far I've only done three of the rows that I planned out in this post, so here's to hoping I improve more as well.  I didn't know this part would be so B O R I N G, though!  I didn't mind quilting it, I didn't mind cutting all the sashing... but jeez, sewing all the sashing on is kind of monotonous.  At least when I see it come altogether and look a little more finished, I get happy. :)

Tuesday, January 17, 2012

Progress

So I haven't done much knitting lately, but I've done a whole lot of sewing.

It came time to post our mockups for the 1911 corset sew-along. Here's mine!

First Fitting - Back First Fitting - Side First Fitting - Front

It looks pretty good, in my opinion--I'm particularly happy that I drafted the hips pretty well on my computer program. What I didn't draft well, though, was the increase in the underbust measurement:

First Fitting - It's loose!

It was way too big, and this was bothering me--should I just take out the amount I added?  Would I really fit into an unmodified pattern for a 23 inch waist from the waist up?  If I take that away, should I add some length up top?  After all, I was kind of worried about some of the fat displacement you can see in the pictures, and it didn't seem like it would meet my underbust line very well, either.

But Jo over at Bridges on the Body suggested just taking out the extra first, before deciding on adding length.  I'm glad I did!

Second Fitting - Front

Second Fitting - Side

There are a few issues with creasing, which I believe to be just the fabric and the lack of boning.  Most importantly: there's no "spill-age"! And I may even need to take out a teensy bit from the length at the top front so it doesn't interfere with my underbust now.  I already did some of this more "cosmetic" shaping at the bottom of the corset; it won't be too hard to adjust the top, so I doubt I'll even try on my mockup again.

Now I'm ready for the next step! :)

Saturday, January 14, 2012

1911 Sew Along so far!

Last post I mentioned I was joining a corset sew-along at Bridges on the Body.  The author also hosts a flickr group that I end up checking about just as often as her blog--it's great for inspiration!

Well, I figured I'd quickly post some pictures of my progress so far--they've been hanging out on my flickr for a bit.

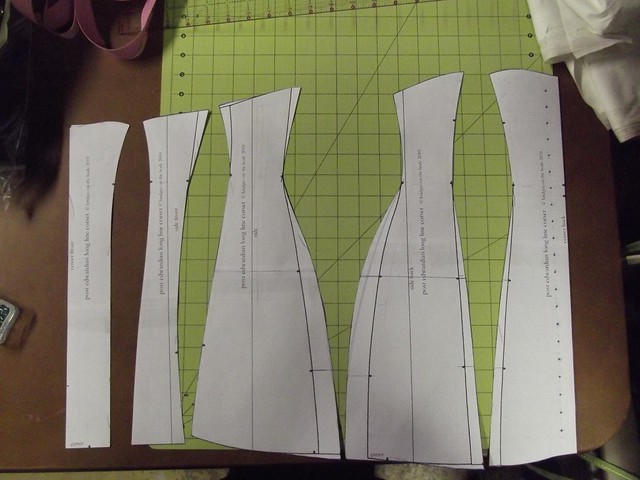
First we have my paint-shop modified pattern...

My Pattern Modifications

Since, you know, I'm a bit too curvy for a slim-lined teens corset.  I mean,  I feel like we're nearly getting into the flapper era, here--the era where women visually minimized hips into near non-existence!

Then there's a sketchy photo of most of the materials I'll be working with...

Supplies

And finally a picture of my mock-up!

Mockup

Now, I do have photos of the mock-up fitting, since I got a bit carried away and worked quite a bit ahead (using some of my own methods, but it's great to hear about how others--including the sew-along organizer--do things!) But I'm trying to keep those hidden until it comes to the right time. :)


In the mean time I gave in and joined Pinterest, since I think everyone and their mother is on it, too. I'm a bit annoyed at some things (I have to have a twitter or facebook account...what?), but overall I realized that it's kind of like what I've done on my computer for years: saved a bunch of "inspiration" pictures.  (Years, later I'm like, "what the hell is all this crap", and now I will spend another few years erasing all of it from my computer as I find it.)  At least on Pinterest it's not clogging up my harddrive, and it's much more easily viewable, if I do say so myself. 

Anyway,  I've created an inspiration board for my sew-along corset


And there you go!

Wednesday, January 11, 2012

Crop-A-Dile II "Big Bite" Grommet / Eyelet / Snap Setter

So I guess I never mentioned that I decided to join in on this sew-along:


It was kind of a last minute decision, anyway. I've got lots of corset materials back home; I've patterned a few, and I've started constructing even a few more, but I've never finished one!   I figure this might help me do that, and maybe it will spur me on to sew more.... like that billionth cincher pattern I've made.

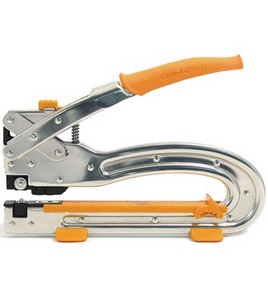
Any-who, how does that relate to the title of my post?  Well, I had bought this oversized "Crop-A-Dile" a little while ago:

bigbite5
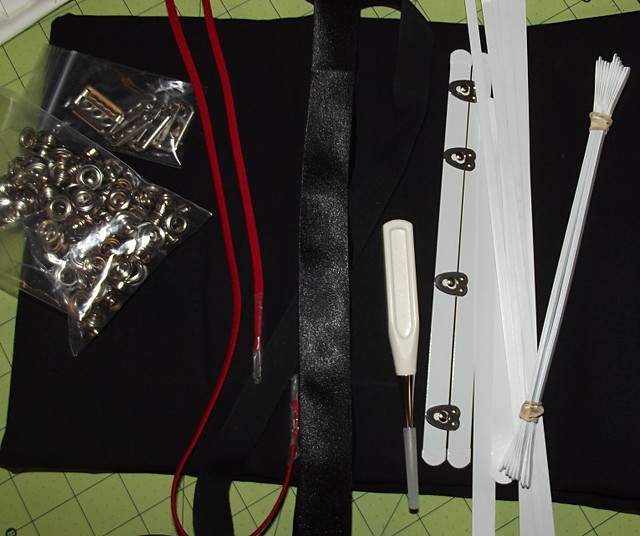
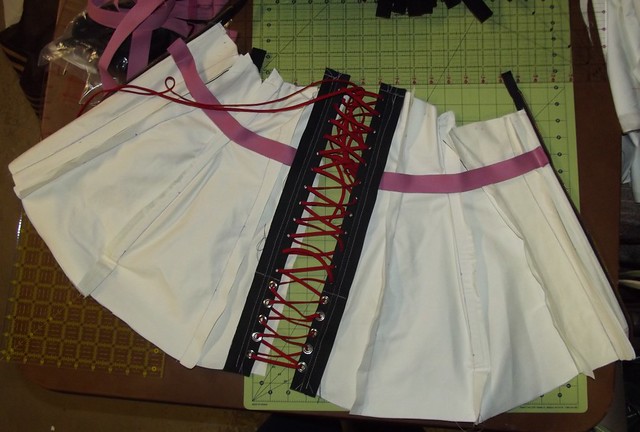
I figured now was the time to figure out how to use it--after all, I needed to make a simple lacing strip for my corset mockup, right?  Since there's not many comprehensive reviews about this product when using it with heavy-duty grommets and fabric, I decided to write down my thoughts.

You see, it's a scrapbooking tool--you find it in the scrapbooking section of your arts and crafts store--but it markets itself as a tough product that can easily slice holes through things like fabric, cork board, and vinyl; and can set grommets, eyelets and snaps in almost all of the same.  But most people online seem to be using it for a simple scrapbooking tool, and I really wanted to put it to the test!

I mean, it's not a new idea for garment making--if you were a professional corsetmaker or leather-worker, perhaps, you'd have a $150+ high-quality product like this one from corsetmaking.com. The Crop-A-Dile, on the other hand, sells for $40 retail at places like Joanns, where you can easily get  40% off (plus an extra 25% off) if you wait until the right time.  At around $15, I figured I could live with the disappointment if this didn't work. 

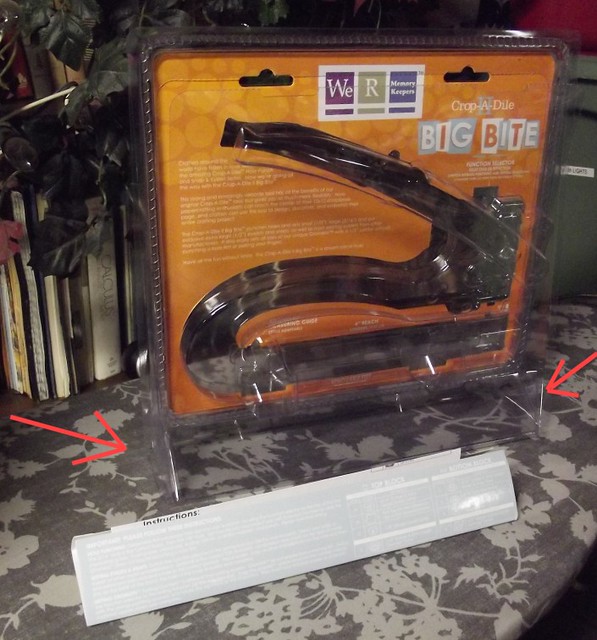
First of all,  I get it out of the box and.... oh, where's the instructions?

The Crop-a-Dile II "Big Bite"

You see, the plastic holding the setter itself has a nice, easily open-able perforated line.  But the instructions?  They're in that little triangular spot in the bottom that the arrows in the picture are pointing to.  That isn't easily noticeable or as easily opened!

I have to say it cuts pretty well--that's one of the main problems I have with grommet setting.   I would not use the hole punches for heavy duty corset making, but for fashion garments it would be pretty awesome.  The only qualm I have is that it leaves fabric tags like so:

The Crop-A-Dile II "Big Bite" Hole Puncher

You know, like when you have an old fabric punch that only punches 95% of the circle?  But that's very easily clipped away.

The main problem scrapbookers seem to have with this tool is that it is finicky with what metals it likes--it totally crushes cheap, soft metals.  I was wondering if I would have the opposite problem; would this be tough enough to splay two-part rolling/flare grommets that are even harder than scrapbooking grommets--and even harder than playing fashion-garment grommets?  Crop-A-Dile says it can do many kinds, and many different sizes of grommets, after all.   I'd say that's only a partial truth:
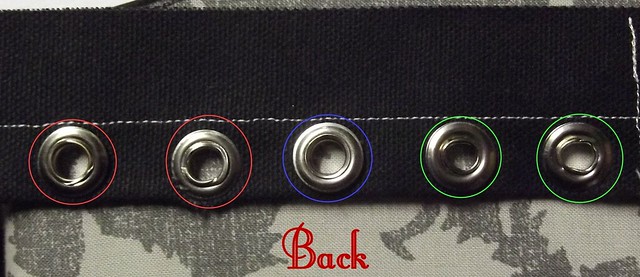
bigbite3

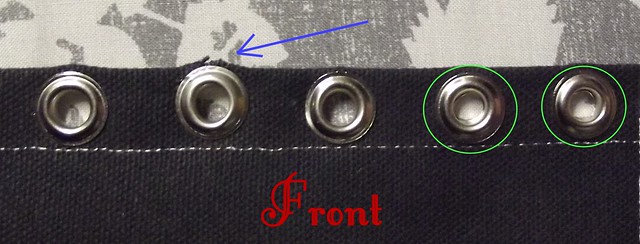
Here's the results of the first testing.  (By the way, you can click on any of the images for a more detailed view, as well!) The ones on the right (in green) I tried to set solely with the Crop-A-Dile II.  Well, they rolled/flared a little bit, but there's a whole lot of distortion.  The ones on the far left (in red) were set with a combination of light hammering and then the setter, just to see if there'd be an improvement.  You can also see a bit of crushing in those, too.  The middle blue one is solely hammered just for comparison.

In the front view, you can also see a bit of distortion in the green grommets, if you look very closely:

bigbite2

So I guess the setter is strong enough to handle these things?!  But it just doesn't handle them right!

After thinking about WHY it doesn't handle them right for a while, I came to this conclusion: my grommets are a size too big.  I have size 0 grommets--in the wire-gauge world, that would be SMALLER than a size 00.  In the grommet world, I guess that's different. Now, if the Crop-A-Dile lived up to its expectations, it SHOULD set grommets that are bigger than the 1/8 and 3/16 dials on the setter.  But  here's the thing: the "bigger than 3/16" dial on the setter is a generic one.  It's not very well shaped! Maybe if I were using it for scrapbooking, it'd be fine, but it doesn't stand up to large sized high quality grommets. And I think that's the problem. 

PS: Now curiosity is going to get the better of me, and I'll probably end up buying some 00 rolling grommets, so I can update again later on. I also have some fabric-store cheap grommets to try out, but I think those will work fine, too, considering it could mash these considerably harder ones!)

PSS: That blue arrow in the last picture?  It shows that no method is infallible!  When hammer-setting my grommets, accidentally mashed my hammer down on my fabric instead of my hand held grommet setter, and made a nice, weak, gaping hole.  Oops.

Monday, January 9, 2012

Halloween (is Everyday), Hey!

Man, I've been working on this since about September, and now It's the new year, and I've not posted anything about it yet.

It's my first quilt, and I decided after a while to go with the "quilt as you go" method.  I'm glad I did! I finally got done quilting all but 4 of the squares, so I decided to take photos of all of them and put them together in a "mockup" to ensure I liked the placement. And seriously, before I "photoshopped" in the sashing that these pieces will have when they're joined together, it looked WAY TOO BUSY. 

But now... now it just looks awesomely tacky, like it should!

Quilt "mock-up"

The only blocks I don't have individual pictures of are the 54/40 blocks, but they're all the same layout.  The pictures aren't the greatest to show color and detail, but they're just for mockup purposes, so I think they serve their purpose well.  The other blocks were all of my own invention, except the spiderwebs.  I tried  "wonky paper piecing" for two of the spiderwebs, but it just did not work out for me (can you see?  They look way too wonky!), so I developed my own method to make the other four, anyway.

This will have 2.5 more borders around it as well, so it's not quite close to done yet.

And I also have a few other sewing and knitting projects in the works, too. :)

Tuesday, December 27, 2011

One more... and then I'm DONE!

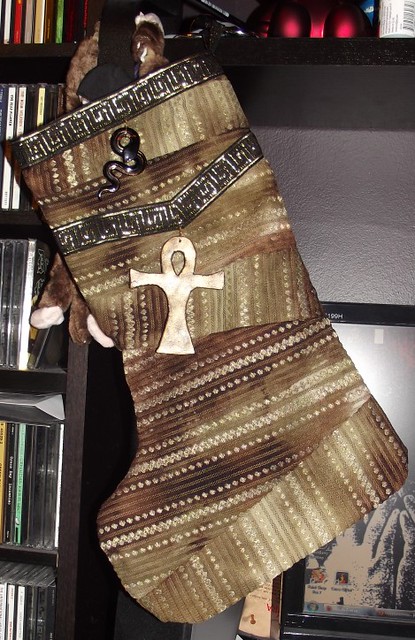
This is the last stocking; it's made for my boyfriend's mother, who loves Egyptian-like things.

Egyptian-Inspired Stocking

I'll have to ask you to excuse horrible lighting from the dark walls and yellow lights, the brush ends and jar of glaze, the CDs, the woot monkey in the background, the fact that this is being hung on the ear of a stethoscope....and uh... everything else.   I just wanted pictures before I gave this away, and it was already Christmas Eve! 

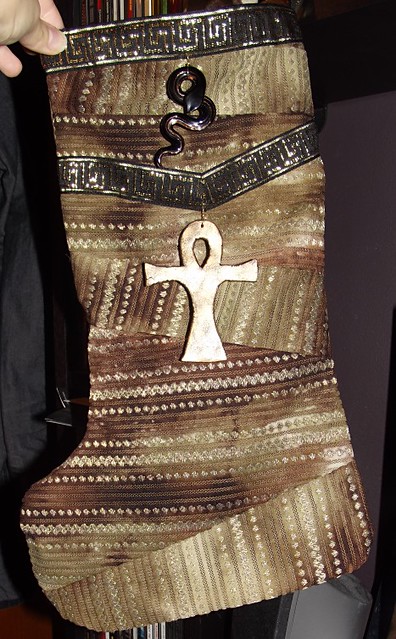
Here's one more picture of it standing straight, just because I haven't gotten used to the charms dangling while the stocking is hanging yet, haha. 

Egyptian-Inspired Stocking (from a different angle)

My boyfriend picked out everything for this one, and of course he's not a sewer, so he picked out the slinkiest, hardest-to-work-with polyester lace weave for the decorative side of the stocking. It looks nice, but I had  to utilize some old wrapping paper to stabilize it while making it!  We bought the snake from the bead department of the craft store, and it's held on with some gold wire... as is the ankh, which I think turned out a little too gold for the stocking in comparison with the snake, but oh well.

I made the ankh myself, by the way, out of polymer clay that I had pressed some glitter paper onto to give some texture.  It also just happened to have some nice authentic "cracks" from when I was folding it to warm it up--perfect!  Add a stippling brush and some paint to make an uneven, mottled layer of gold all over, and it came out pretty neat looking...but unfortunately, I have no great pictures of it because of the lighting and flash. 

Here's the thing that I find the funniest of all about this stocking: the ankh symbol is associated with death/eternal life.  Perfect for a Christmas stocking...uh...right?!?!

Wednesday, December 14, 2011

Finished!

Finally!  Save for one or two one-off stockings, I'm done sewing for the holidays. Just in time, these need to get in the mail soon, anyway. :) Not to mention, I was getting soooo bored of sewing Christmas stuff, only Black Sabbath and Slayer could keep me interested!

Unfortunately there was no sun at all today, so my photos might look extra shadowy.

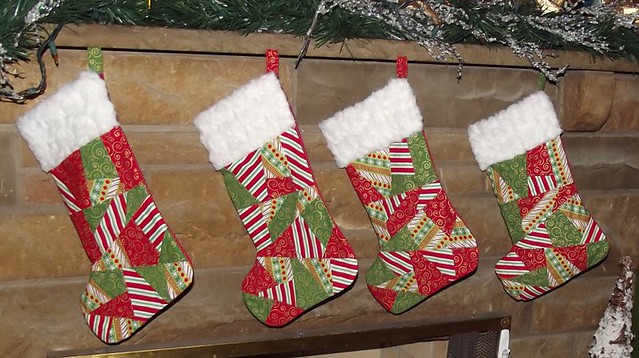
Here's the first set of stockings that I didn't get photos of before (the last one might look extra funny because it's a bit full already!):

Patchwork Stockings

Patchwork Stockings

And a detail shot, maybe this will be better than the first one:

Patchwork Stocking Detail

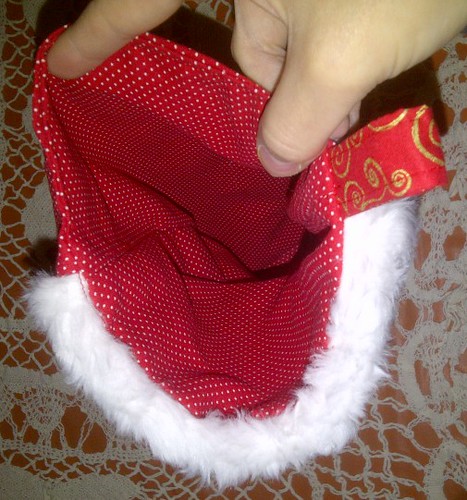
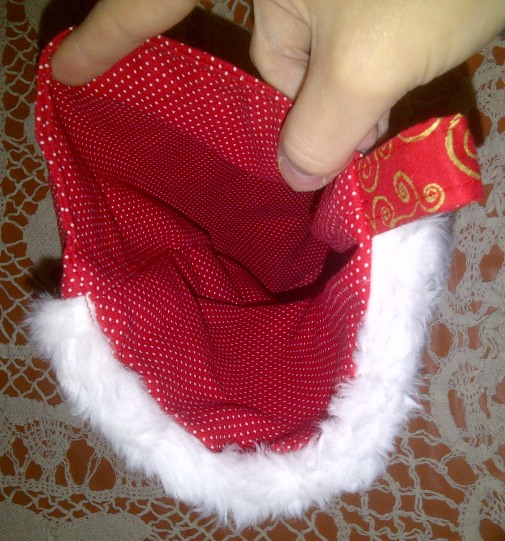
Now, if you remember, the insides of these stockings as well as my Horde stockings look like this:

A Stocking Lining...

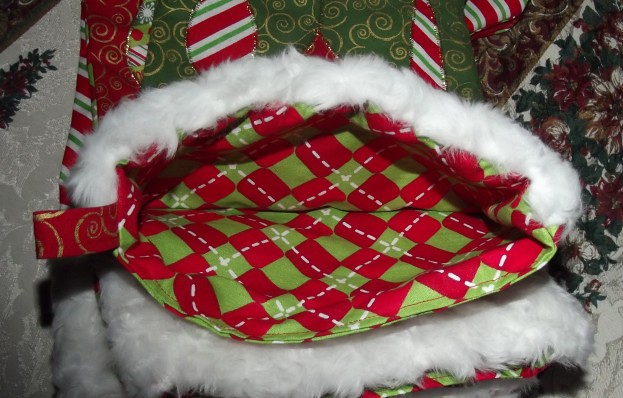
But the other eight stockings (the ones in the last post, and the ones I'm about to write about next) have a lining and a backing that looks like this, which is quite a bit more busy!

Another Stocking Lining

You see, the fabric I bought before wasn't on sale again when I figured out I bought way too little, so this Christmas fabric ended up being a bit cheaper.

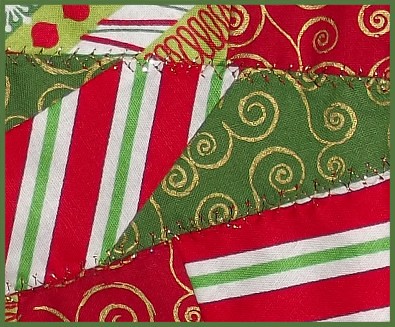
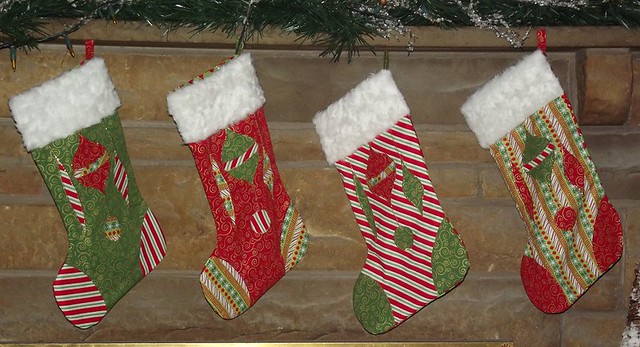
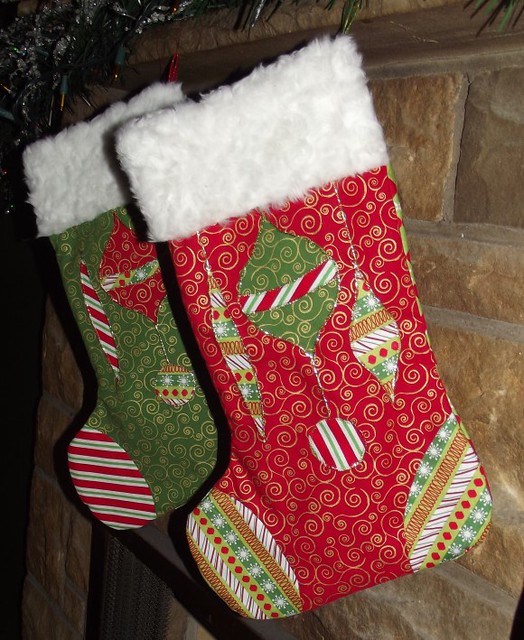
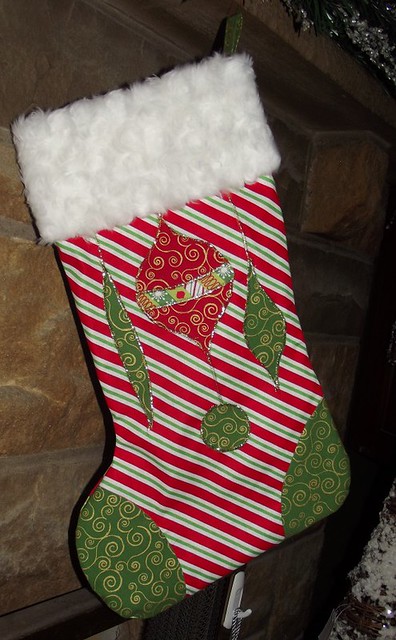
Anyway, the last set of stockings were particularly inspired by my dad, who loves old Christmas stuff. I made what I thought looked like some old-ish ornament shapes and cut out my pieces--I just appliqued them on freely using an almost-satin stitch and my metallic thread.  I say almost-satin because I didn't want to pull the fabric too much, as I didn't use any stabilizer, fusing or starch, and I didn't want the pieces to stretch out of shape.  So instead of using a zig-zag stitch at "0", I used it halfway between 0 and 1.   To make them look like they were hanging, I used the same stitch to make lines (before I appliqued the pieces on, of course).  There's even a line on top of the big center ornament, but unfortunately the fur covers it up--that's a lack of planning on my part!

Retro Ornament Appliqued Stockings

Retro Ornament Appliqued Stockings

Retro Ornament Appliqued Stockings


Aaaaaaand that's all for now. :)

Monday, December 12, 2011

More Stockings!

Here's my second set of four stockings, all completed.   The last set of four is halfway done, and I still need to take pictures of the full first set that I gave a preview of in my last post (I got a new camera as an early Christmas present, by the way, so hopefully my pictures will improve!)

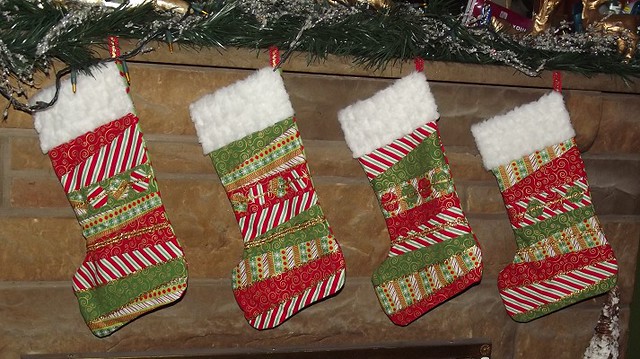
Wacky Stripe Stockings

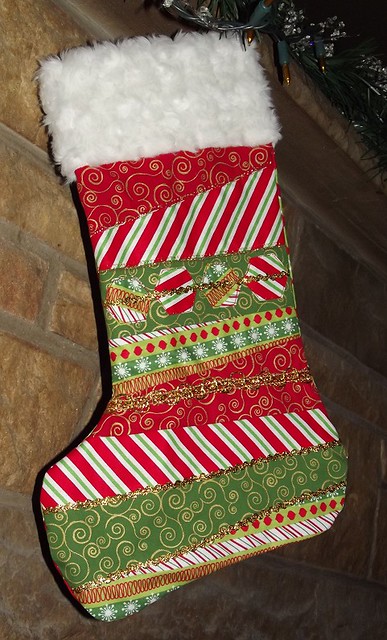
Wacky Stripe Stocking

The toes look a little funny in these photos, but it's mostly the angle and my fiddling with them to make them all lie in a nice direction to photograph. They're not all 100% the same shape, either, but they're supposed to be all unique, so that's ok!

As with the first set, I laid out the pattern pieces I made on top of my stack of four fabrics, and cut out the pieces for all four stockings in one go with the rotary cutter. :)

I added some gold ric-rac and trim to these, so they're a little more bling-y than my first set. The hanging tabs also have ric-rac on them, as you can kind of see in the first photo!

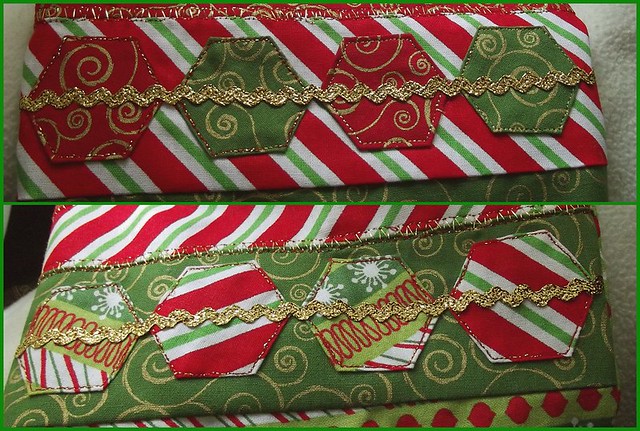
And my favorite part--I added some hexagon appliques!

Wacky Stripe Stockings--Appliqued Hexagon Detail

I'm particularly thrilled with how they came out--I just cut out the shapes and ironed down the edges by eye, then sewed as close to the edge as I could manage. The only thing I would do differently again, however, is not use two threads on the top! You see, my metallic thread is a little more prone to breaking under stress, so I wanted to reinforce it by threading a strand of metallic and a strand of red thread through my machine at the same time... but I nearly caused tension and alignment issues when the red thread got too loose compared to the metallic and started bunching up in the bobbin area. Does that even make sense? I don't know, I'm just glad they look ok! You can see that stitching on the last two hexagons in the top picture look much more metallic--that's because I finally got fed up and took out the red top thread.

I'm also pretty impressed with these last macro photos: they're taken on my new camera with no flash! I'm not used to having the ability to toggle the flash on macros. Usually, I'm so shaky that without flash, macros come out a blurry mess. They were taken in quite blue-ish natural daylight (not quite sunny, but not overcast), so I did have to color edit them a bit to get them to look a little more true.

Tuesday, November 29, 2011

And now, for something different...

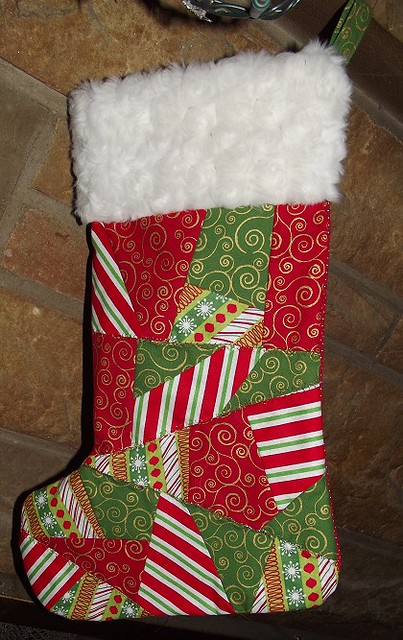
This is a hint as to what I've been doing lately: a whole lot of sewing!

stocking01
(Disclaimer: I still don't have a good camera, and I now live in a place with few ceiling mounted lights or large, airy windows.  So instead of photos with bad incandescent lighting, I now have photos with varied angles of bad incandescent lighting.)

Actually, this isn't my biggest project, but I put that one aside to finish these sets of stockings up in time to ship off to my family for the holidays.  Since I'm not at home this year, I wanted to send my family something neat.

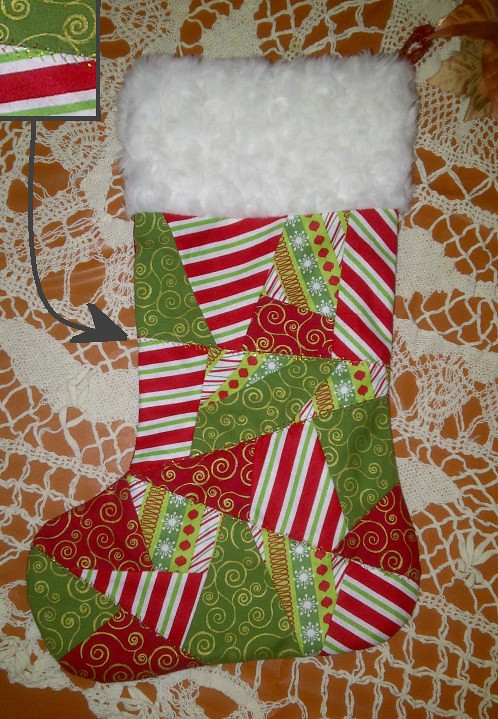
I say "these sets" and I only have photos of one stocking... oops.  I drafted the patterns on these and layered up my fabrics so I could cut out four stockings at once, and also so that each one would have a unique combination of fabrics.  I made all four of this style, but I only have photos of the first one so far.  I'm halfway done with a second "set" of four in a wonky stripe style, and a third set I'm planning to do with applique pieces... not fully sure how yet, though.  I didn't put batting or quilting on them, which I was kind of torn over doing, but I did try some metallic decorative stitching, and I did line them fully:
stocking02

In addition to those, I also made these for my boyfriend's younger cousins:
HORDE STOCKINGS!


stocking03

All I can say is, he better be right about his cousins playing Horde-side, too, because 1) he is known to have some faulty memory errors here and there, 2) it would be really hard to applique that little lion crest thing, and 3) why would you play Alliance anyway?

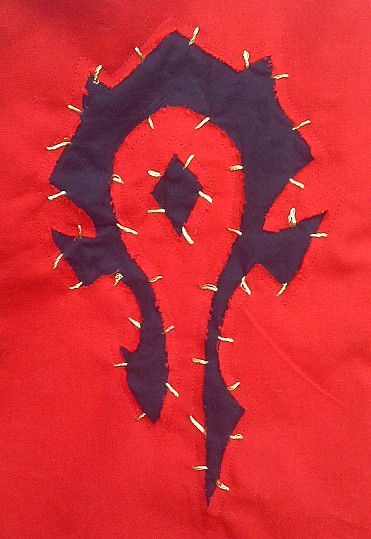
So anyway, onto the details.  I always wanted to make some geeky-like applique, and this was the perfect chance.  I used a method that I think is called reverse applique, and I left the edges raw, because I felt it fit in style with the Horde--I even roughed the edges up with my fingernails.  To make the design, I printed the insignia on some freezer paper, then cut it out  with an xacto and ironed it onto my stocking pattern that I had backed with some black scrap fabric.  I then carefully sewed OUTSIDE of the pattern, and then cut right about on the edges of the pattern itself, but only through the red part of the fabric.  After I sewed the rest of the stocking up, I thought it looked kind of plain, so that was when I added the gold "rustic" top-stitching, to make it look a bit more like, say, the banners in Orgrimmar.  Ideally, I should have done this before sewing everything together; I ended up pulling the black fabric a bit weirdly since I could not hold it flat properly when sewing. 

I tried taking some detail shots, but keep in mind, low quality camera + reds + metallics = not so great macros.  I still wanted to keep some documentation of what I did, though!

stocking04

stocking05

And there you go! Hopefully I'll have more stockings to post, soon.  Sheesh, and I'm not even religious.