
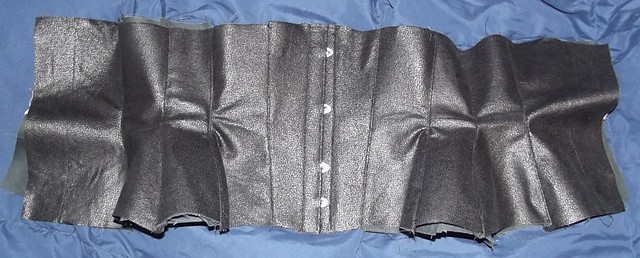
It's looking pretty good, in my opinion! There are a few of the hip pieces that "wrinkle" weirdly due to the very curvy seams, but those wrinkles aren't sewn in, so I'm hoping the boning sorts that out. In fact, I just noticed now that in this picture, the wrinkles are pretty much identical on each side, which leads me to believe my problem may really be as superficial as I think. The next step is to add boning and really test it out.
Now, here's some shots of the inside to show my method! You see, I have a habit of trying something different every time I try to construct a corset....even though, like I mentioned before, I've never yet entirely finished one. For this one, since I was using duck cloth for strength, and was unsure at the time about its properties, I decided to do an inside layer of duck, and an outside layer of duck topped with my fashion fabric. They are sewn separately, only connected at the busk so far.
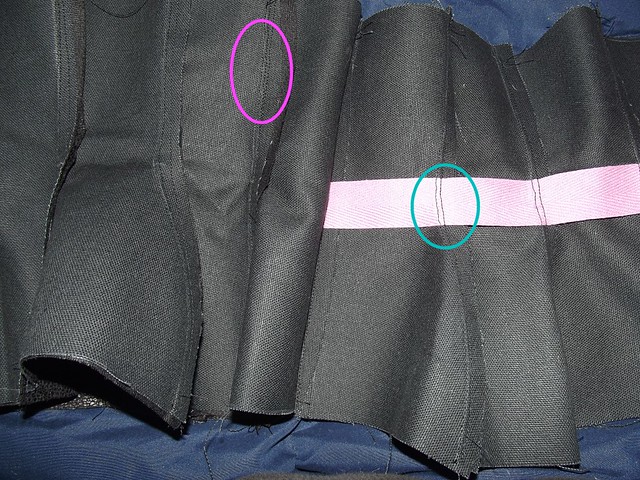
In this photo, if you enlarge it, you can see that in the fuschia circle there are three sewing lines. This is my top layer, and the right-most line is the one that is holding my suedecloth to my duck. The middle line is the base seam holding different panels together, and the left-most line is the topstitching holding the seam--and the seam allowance--down. In the blue circle, you can see only two lines--the left being the seam, and the right being the top stitching over it.
Now, it might not look like much in the picture, but you'll notice that the seams of both sides are facing the same direction. That's because the front side is turned over; when properly laid flat, one side of the seams will face left, and one will face right. The plan is to stitch about 1/4th of an inch from a panel's seam on either side, which will leave me with a built in boning casing--the boning will fit between the seam allowances, giving it two to three layers of protection on either side. I'm not even sure if that will make sense to ME later on, but there you go.
Lastly, because I sometimes fail at sewing overall... there's the one thing bothering me about my construction so far:

Once again, you might have to enlarge it to see it, but this is where my top-stitching kind of wavered--mostly, when I was trying to pull the seam into the right shape at the sharp waist curves, the pulling caused me to stitch a lot closer to the seam line than I wanted. In the left circle there's about a 3mm distance from the seam to the top stitching--this seam is by my ribcage. In the right circle there's only about 1mm from the seam to top stitching...right at the waist. :( Since it will get more top stitching, and there's also a waist tape for strength, I'm not too worried about it now.
No comments:
Post a Comment