A week or so ago I got the urge for some new "hoodies". However, I love personalizing all mine with my favorite bands instead of leaving them plain and boring. In the retail world, if you're lucky enough to find a hooded sweatshirt for your favorite band, it can cost about $40...and chances are it may not even zipper up the front, which limits its usage, in my opinion. Most of my favorite bands don't even have the option of buying sweatshirts, though.
Sooo we arrive at me trying to find suitably warm sweatshirts to modify...when all the stores are bringing out their light and airy spring/summer clothing. I thought this would be the best time to score something on clearance, but it turns out the women's sections in most stores aren't even stocking hooded sweatshirts that thick at this time of the year. Menswear had a lot of options, but none of them fitted as closely.
The boy's section, however, was a success! About $13 bought me two thick, hooded, plain zippered sweatshirts, one of which was a larger size and fit me comfortably, while the other was "smaller"--which only translated to "shorter". The significant other laughed at me, but it looks like a cropped hoodie in my view. So I lengthened the sleeves with patches, and I like it!
Anyway, I used stencils and painting to decorate one so far, and here's where the bulk of my post comes in. I decided to take some pictures of the process, so I've got a tutorial of sorts for stenciling--and making your own faux-screenprinted shirts!
1) Now, technically, the first step would be to get your stencil, cut out a piece of freezer paper to 8.5x11 inches, and run it through the printer to get your stencil. I'm using a text stencil provided free from Stencilpunks.org, but you can make your own stencil by printing out an image and modifying it into a stencil as you go, too--as I've done with an image later on in this post. Remember, freezer paper is only shiny on one side, and the dull side is the side you want the printer to print on--or else the ink won't stick, and you'll make a huge mess. Trust me.
2) You'd then cut out the image with an exacto knife--no need to reverse or muddle with the image, by the way, since this isn't screenprinting.
3) Then you want to prep your image for ironing, like so:


4) Iron the image down, making sure the shiny side is facing the fabric, and the dull side is facing you. Once again, trust me on this--you don't want a mess! I mentioned in the picture that "4" was the best setting on my iron, I believe it was for cotton blends. Remember, you're ironing paper and wax as well as fabric--so you don't want the setting so high that the paper burns... or the wax burns up, either. If your setting is too low, though, it won't adhere at all. Be careful that you don't over iron, because then the wax will all melt and soak into the fabric, destroying the adhesion it usually creates. And iron in one area at once--do not glide the iron, since you don't want to distort your image.
5) Paint! I mention dabbing lightly in a straight up and down motion--this will try to minimize any paint bleeding, which can occur when you force too much paint underneath the paper stencil, or the edges of the stencil have cracked or missing wax.
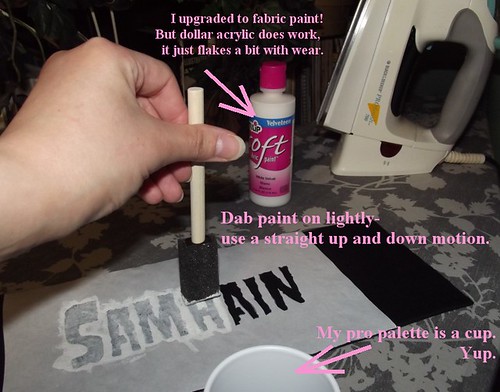
This first layer looks pretty bad, but you can go over the first thin layer with some thicker layers later. You've now created a barrier at the edges of your stencil that will help prevent further bleeding, so you can be a little more liberal with the painting in the next layer(s).
6) You've painted, it's dried... now peel the paper away!
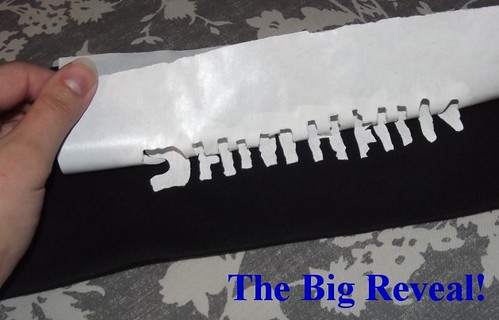

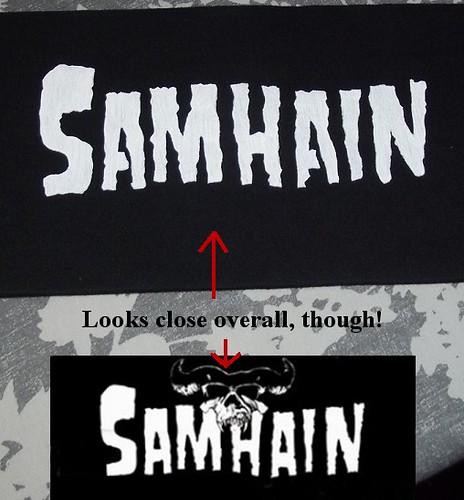
Aaaand you're done! Now, I pointed out the bleeding in my image--it isn't noticeable from far away, but if you are very concerned about this and know you cannot prevent it 100% (as I can't... I'm too hasty!), you can modify the lines of your stencil to account for the extra fraction of a millimeter that the bleeding will add.
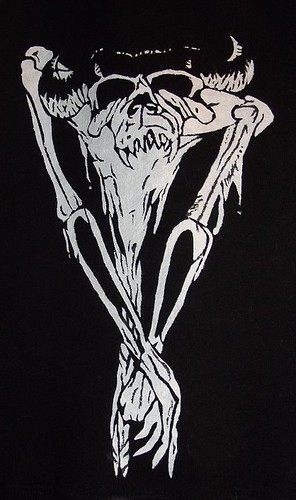
This brings me to my second stencil for this sweatshirt--I made this one myself by simplifying the band's iconic demon from an old gig poster, which you can view here. Since the lines are a lot more intricate and detailed in this, the bleeding caused one or two problems outlined in green--easily fixable with some black paint, but you could also prevent this by making the lines of the stencil thicker as well.

After this part, I went back with some black paint, and re-added the details that I took out when making the stencil. The result is an image that looks a lot more complicated than a mere stencil, but it just as easy to reproduce pretty accurately:
Maybe I'll add pictures of the finished thing as a whole later--unfortunately, I haven't grabbed any photos of myself in it yet!
And, since I mentioned different types of paint on fabric in one of my images earlier, I thought I'd share the results of painting fabric with the extremely cheap acrylic paints you can find in craft stores as well. I used no "fabric mediums" or anything on this. I freehand painted this about 4 years ago, I think, and I decided about 2 years ago to go over it once more to make the print stand out once again. But this shirt has been well worn and washed quite a bit! The craft acrylic has flaked (it's most noticeable in the top left corner, where the flash didn't wash it out)...but look! It even stayed over top of the zipper!
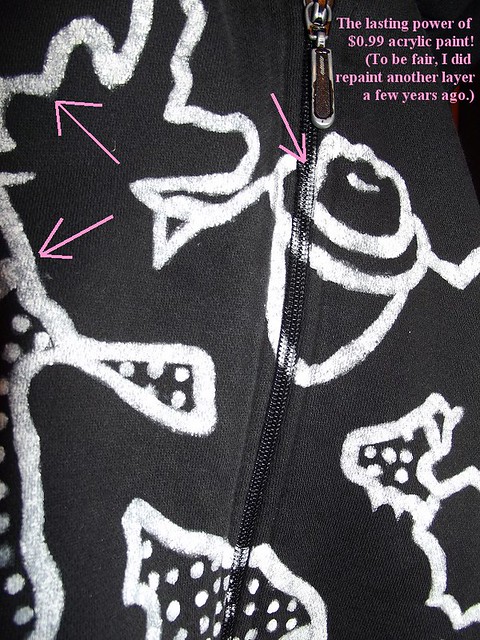
Now, I noticed that the Tulip fabric paint I used this time around was thicker than regular acrylic--I needed less paint to get a solid, non-splotchy layer, and the paint did not seep through the fabric as it does with plain old acrylic paint. This is most noticeable with acrylic, though, only if you are painting a large area--for line work like the image above, there was minimal seeping.
The Tulip fabric paint is supposed to work better on bendable stretchable surfaces, but we'll see how truthful that statement is with time, I guess.